Codex with RemotePC MCP
RemotePC MCP connects your RemotePC account with AI assistants and applications using the open Model Context Protocol (MCP) standard. It enables compatible AI clients to securely access supported RemotePC capabilities through standardized tools, without requiring custom integrations or scripts. This guide explains how to connect Codex with RemotePC MCP.
Prerequisites
- An active RemotePC account.
- Access to Codex account.
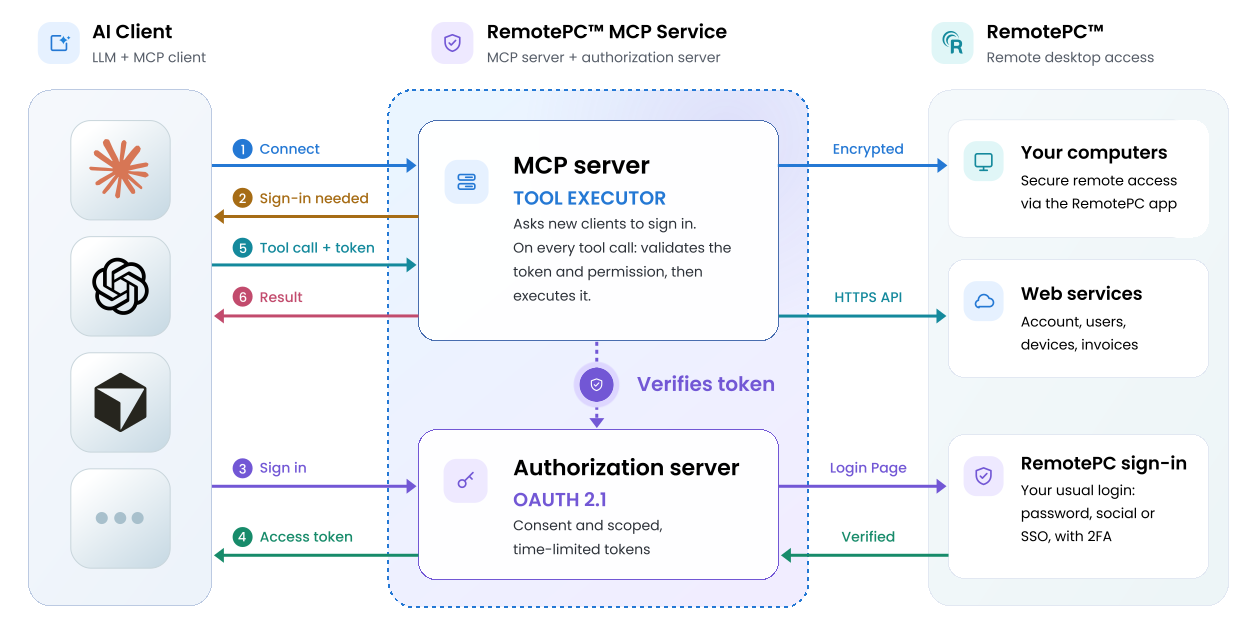
Reference Architecture
Configure Codex with RemotePC MCP
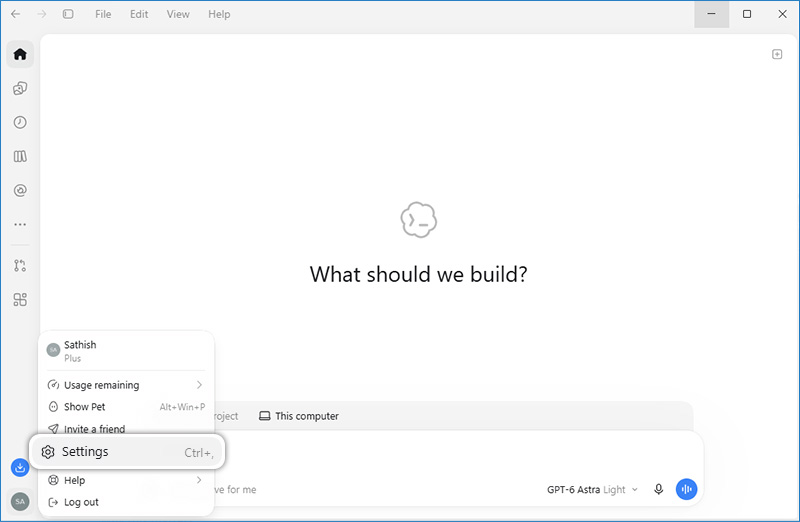
- Sign in to Codex and go to Settings.
- Select Integrations > Plugins.
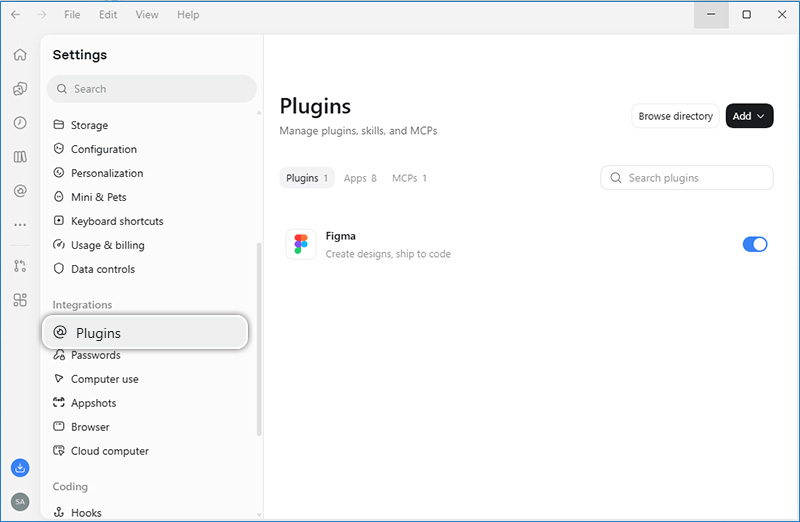
- Select MCPs.
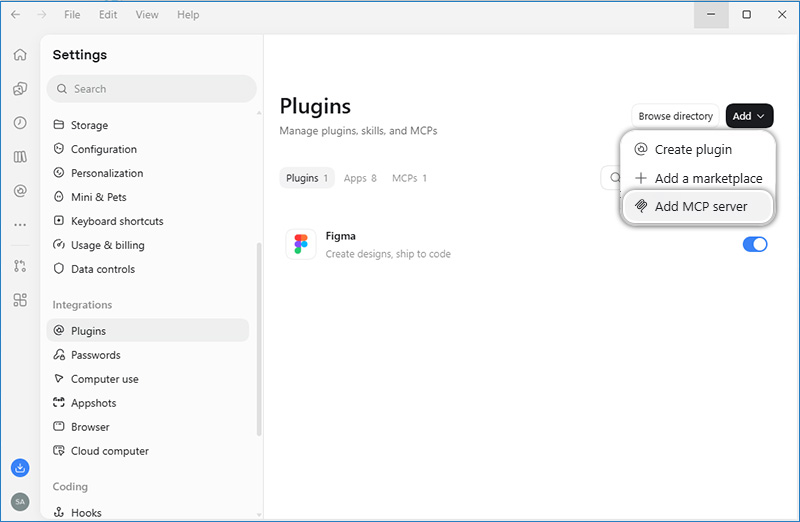
- Click + Add and select Add MCP server.
-
In the Add MCP server dialog box, provide the following details:
- Name: RemotePC MCP
- Type: Streamable HTTP
- URL: https://mcp.remotepc.com/mcp
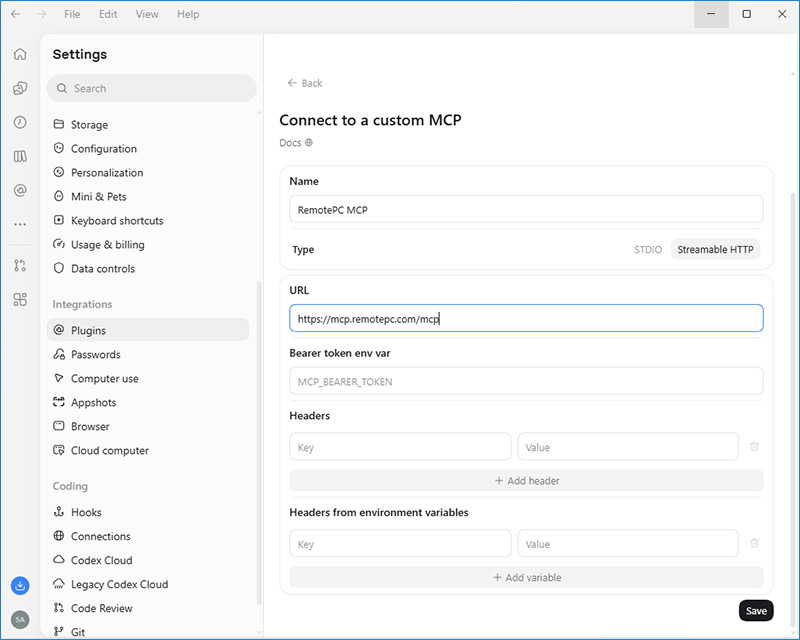
- Click Continue.
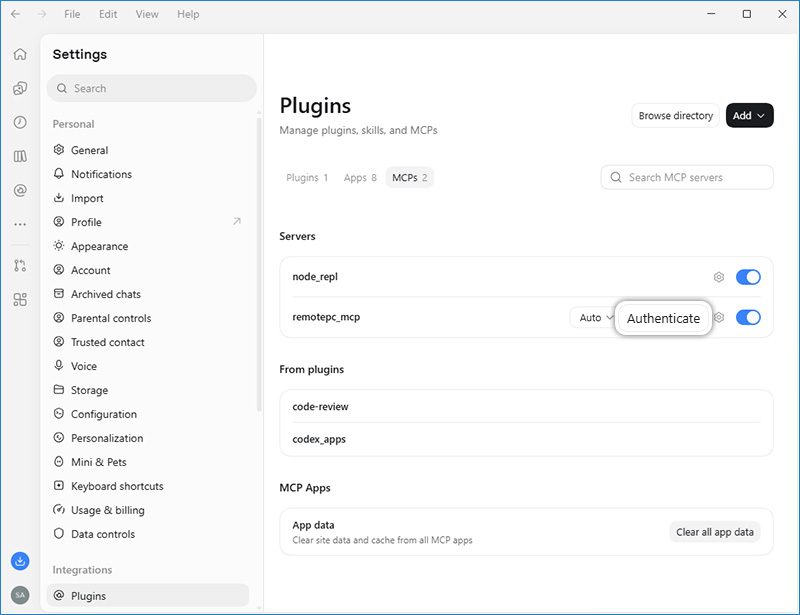
- Click Authenticate.
You will be redirected to the RemotePC authorization page. Sign in to your RemotePC account.
- On the Session Settings page, configure the following:
- Session timeout: Set how long the authorization remains valid. The timeout can be specified in hours or days.
- Permission: Select Full Control or View Only access.
- Click Authorize Access.
After authorization is complete, you will be redirected back to Codex.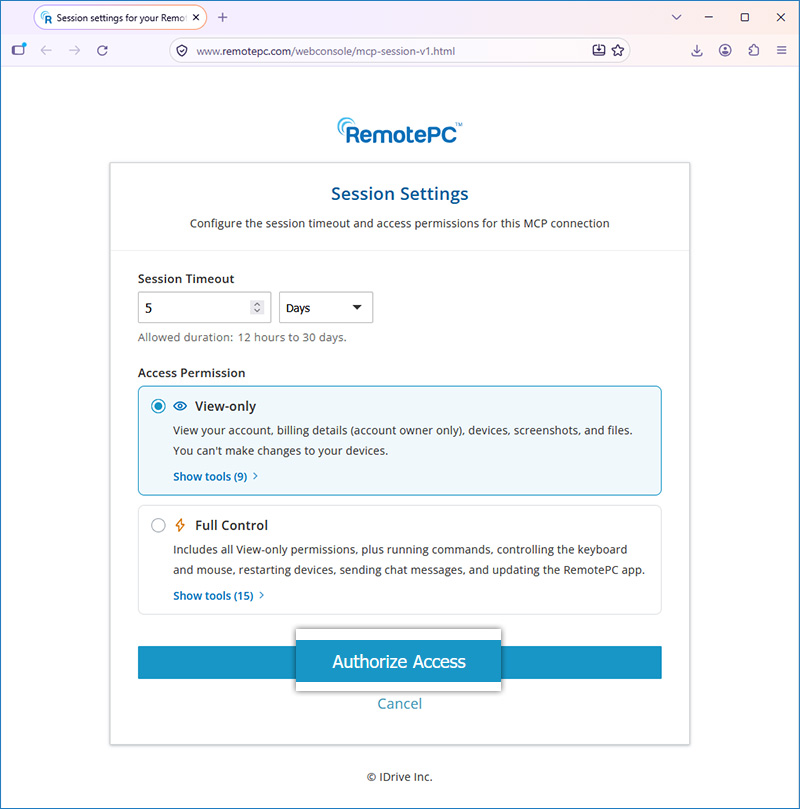
RemotePC MCP is now connected to Codex. You can start using the supported RemotePC tools through Codex to access supported RemotePC account, device, and connectivity capabilities. Reopen or refresh Codex if needed to make the RemotePC MCP tools available.
Configure Codex CLI with RemotePC MCP
You can connect the RemotePC MCP server to Codex CLI using OAuth authentication.
- Add the RemotePC MCP server
Execute the following command in your terminal:codex mcp add remotepc \
--url https://mcp.remotepc.com/mcp
- Authenticate with RemotePC
After executing the command, Codex CLI detects that the MCP server requires OAuth authentication and initiates the sign-in flow. Your default web browser opens and redirects you to the RemotePC authorization page.- Sign in to your RemotePC account.
- On the Session Settings page, configure the session timeout and access permission.
- Select Full Control or View Only access.
- Click Authorize Access to grant Codex CLI access to your RemotePC account.
- Complete the connection
After authorization, you are redirected back to Codex CLI, which securely stores the OAuth credentials.
You can now use the supported RemotePC MCP tools through Codex CLI to access your RemotePC account, device, and connectivity capabilities. If the tools are not available, restart Codex CLI to reload the MCP connection.